Shop
- PCB Repair
- Products
- Luxury sofa
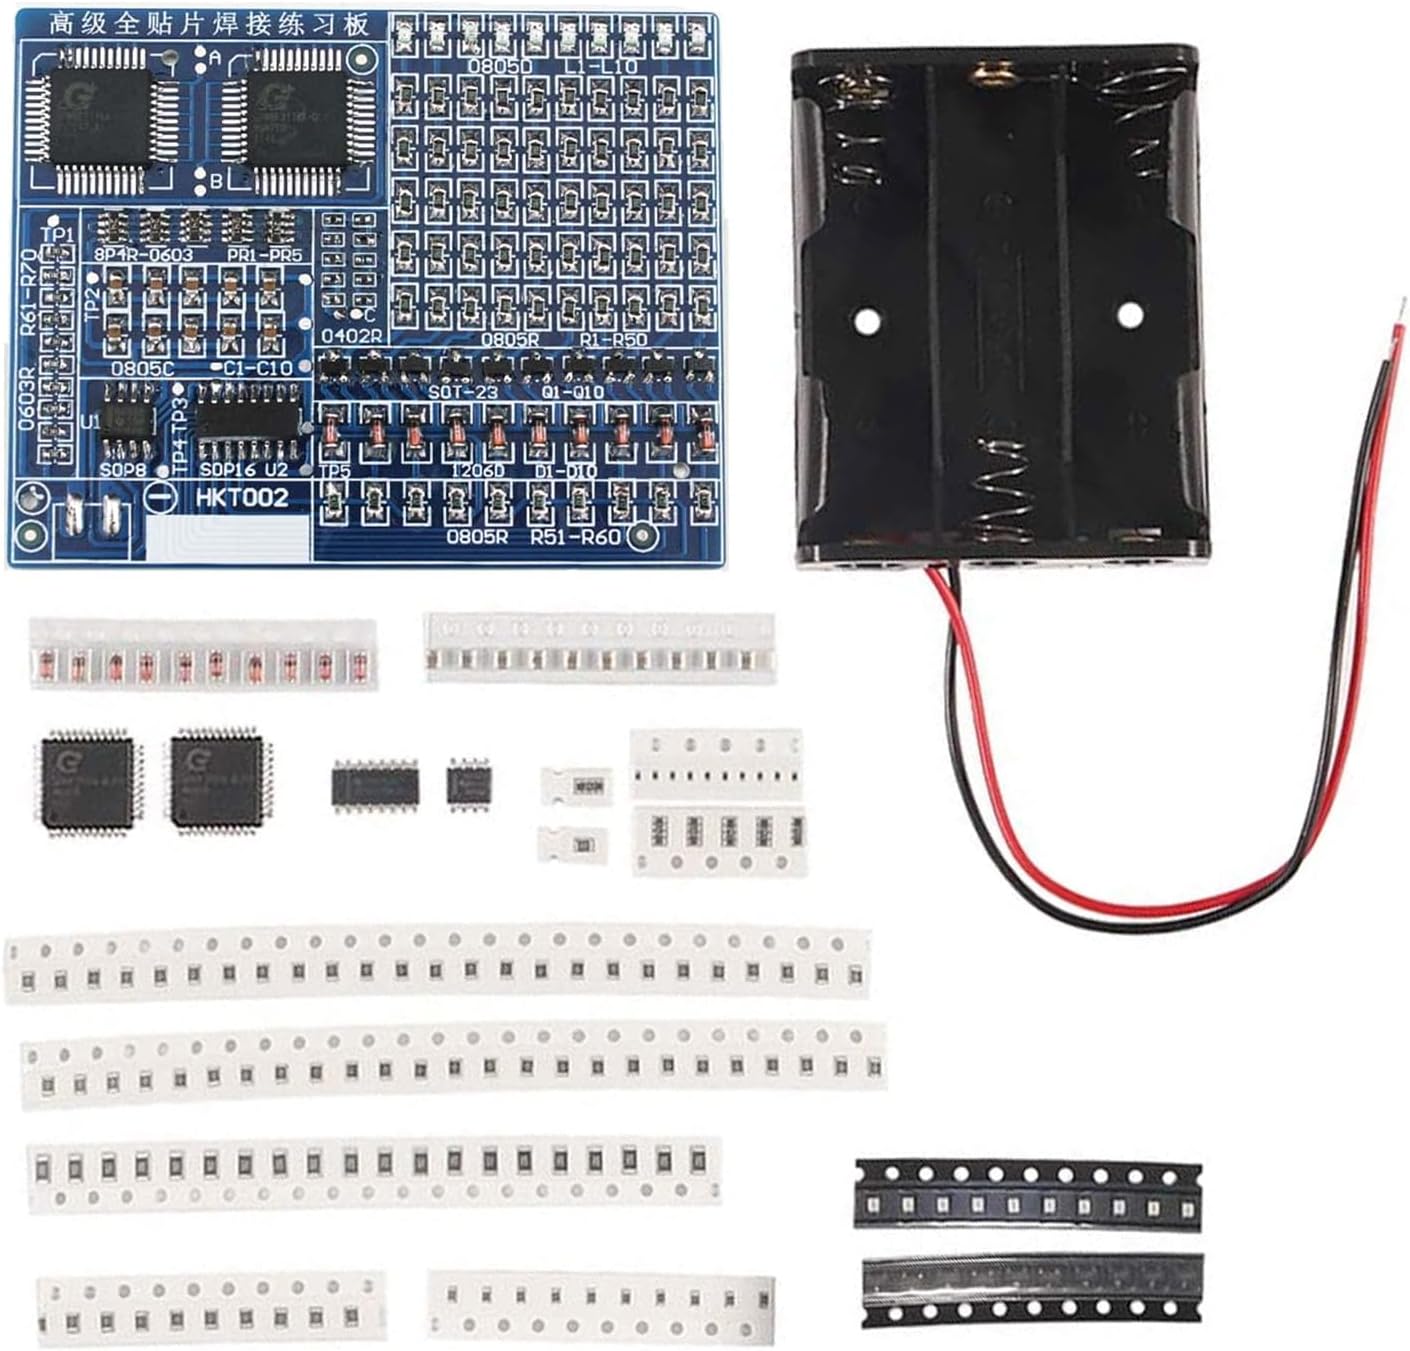
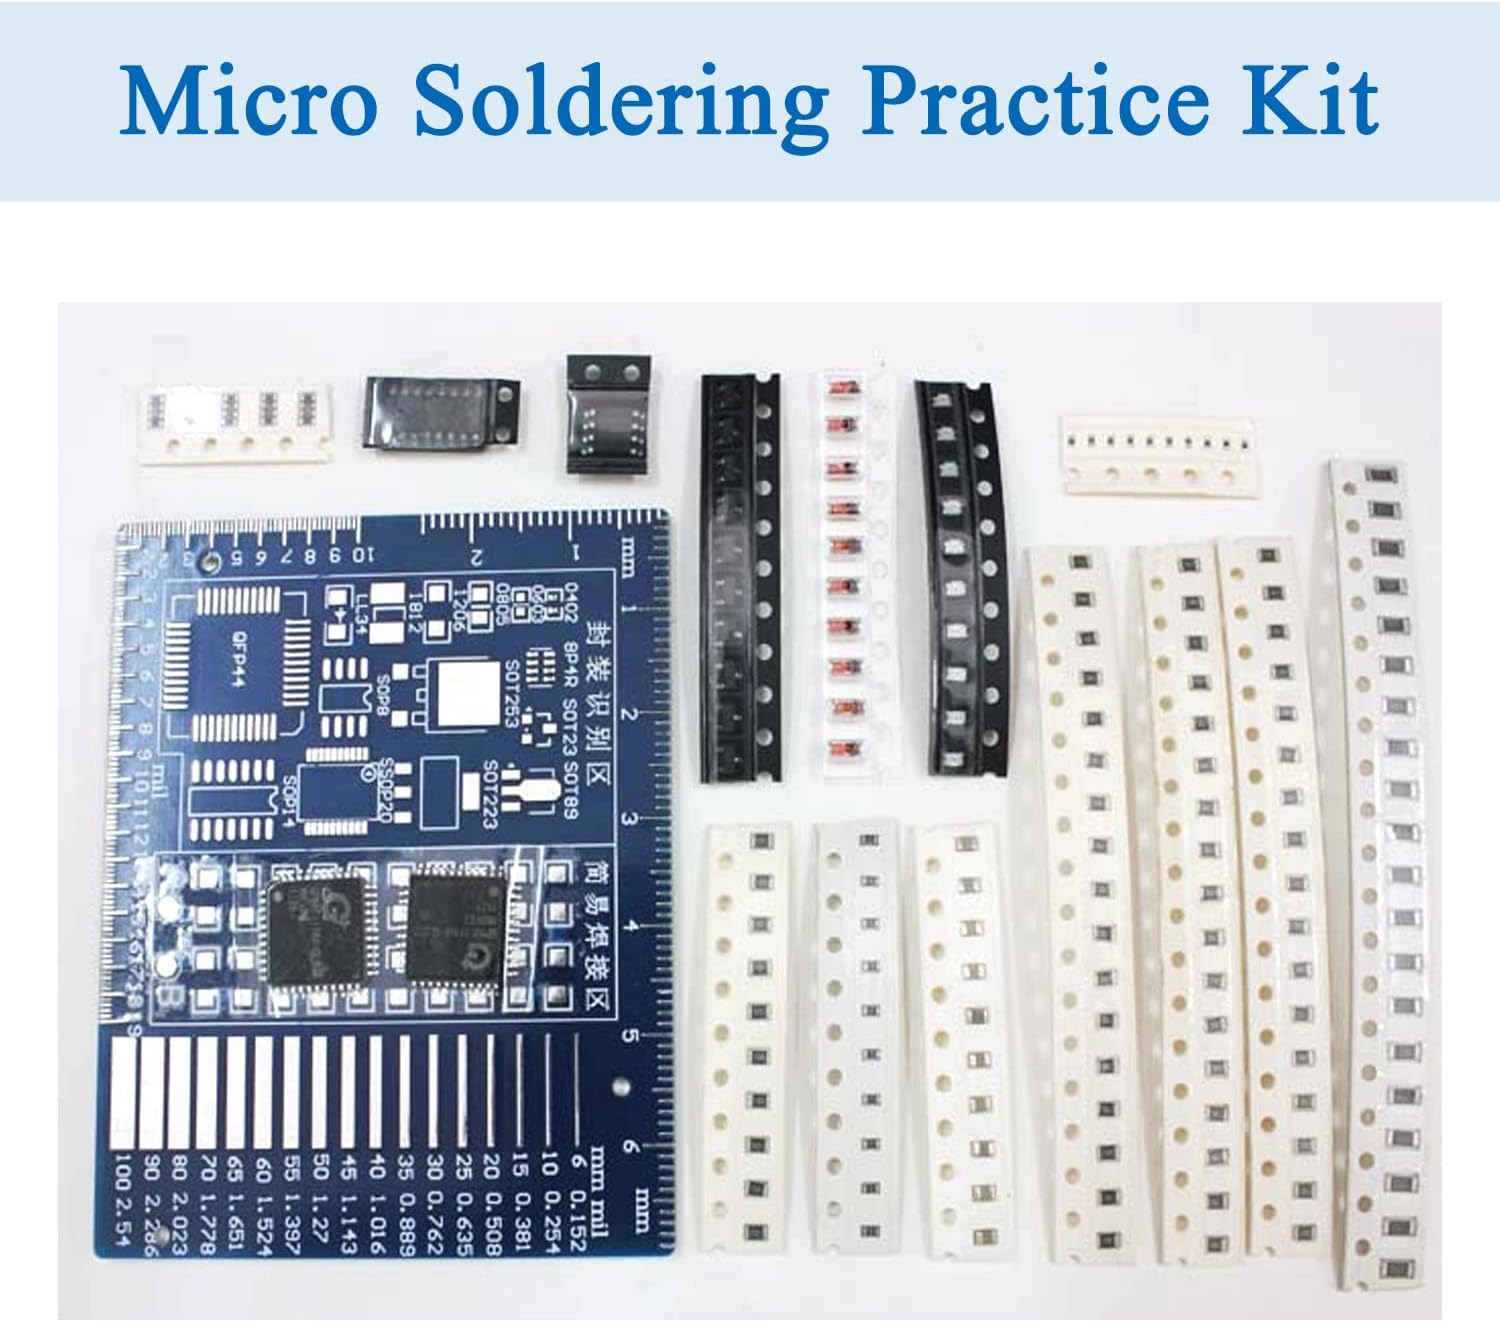
- SMD/SMT Components Soldering Practice Board Electronic Project Kits DIY Soldering Kit Skill Training Board Led Transistor SMD Soldering Kit SMD Soldering Kit
Description
Price: $7.99
(as of Dec 22, 2024 09:24:41 UTC – Details)

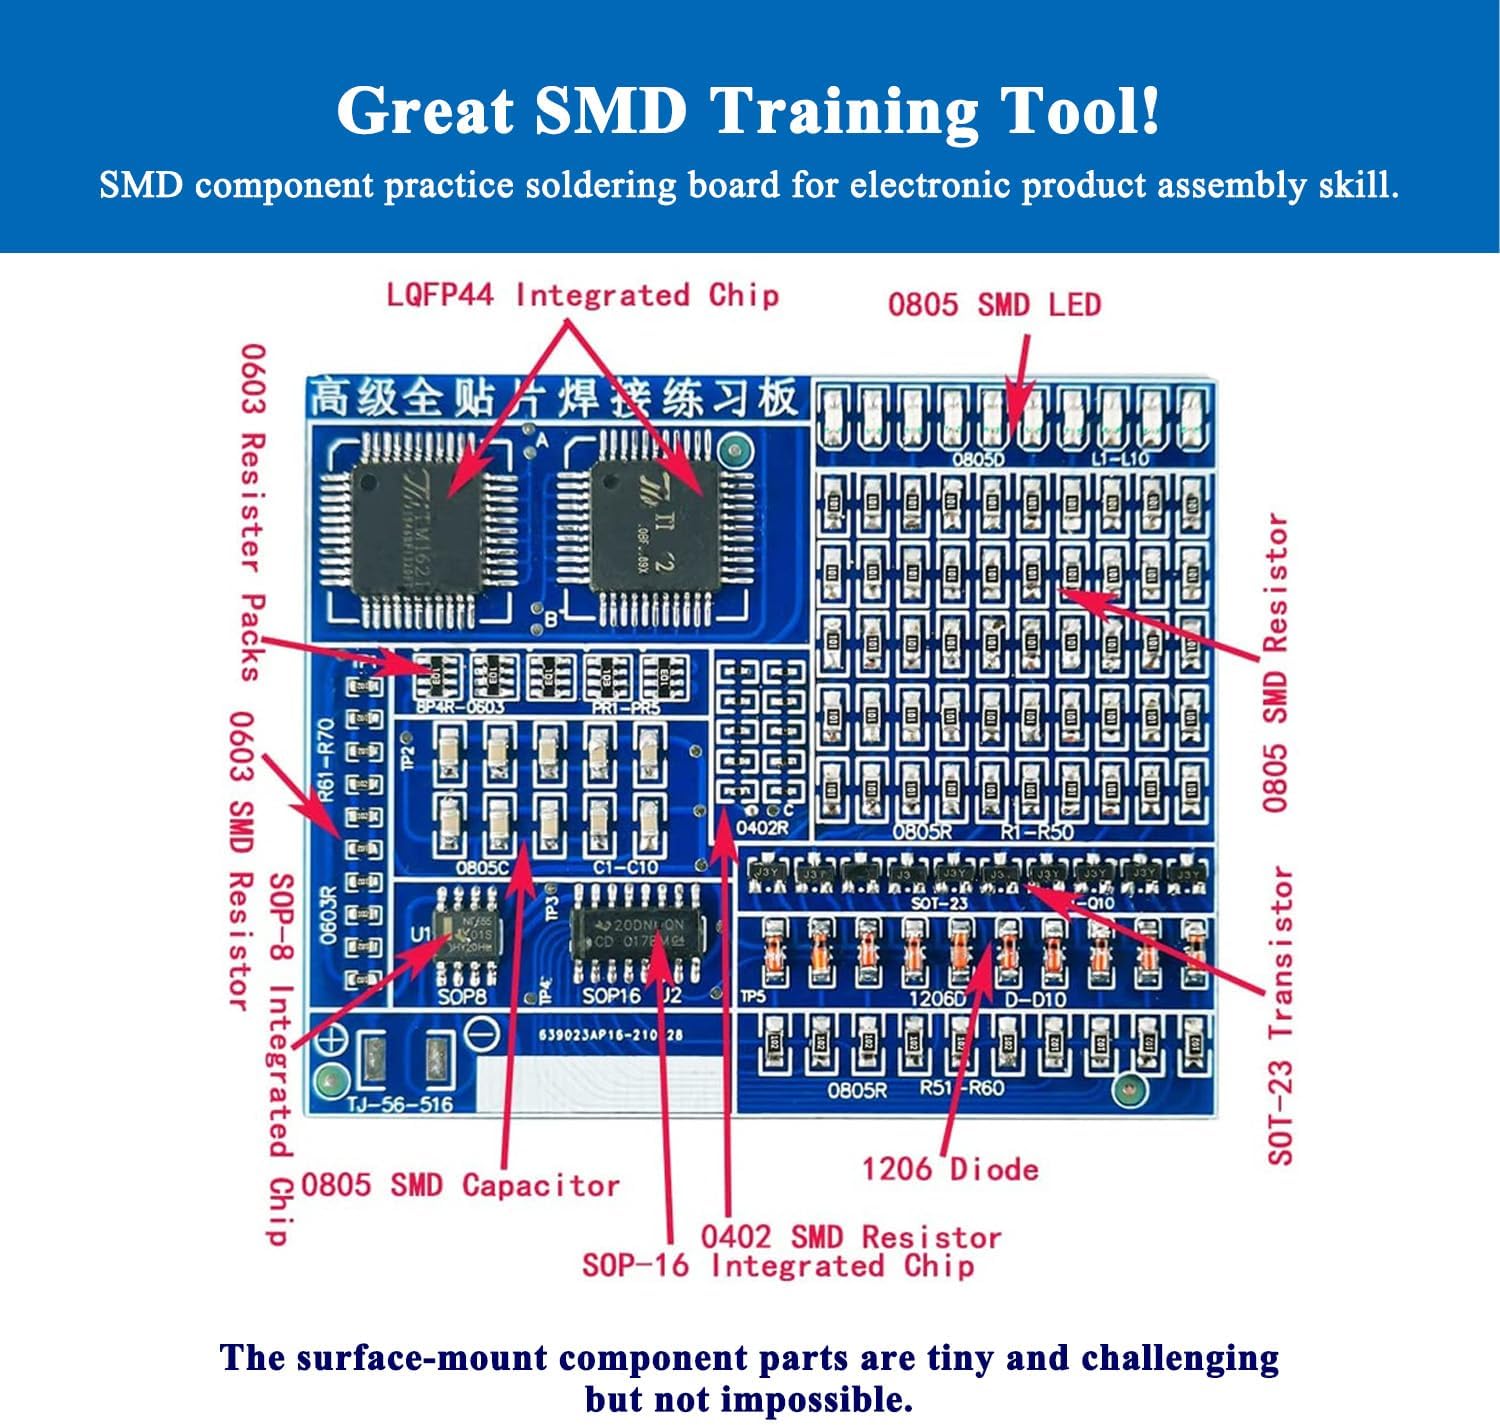
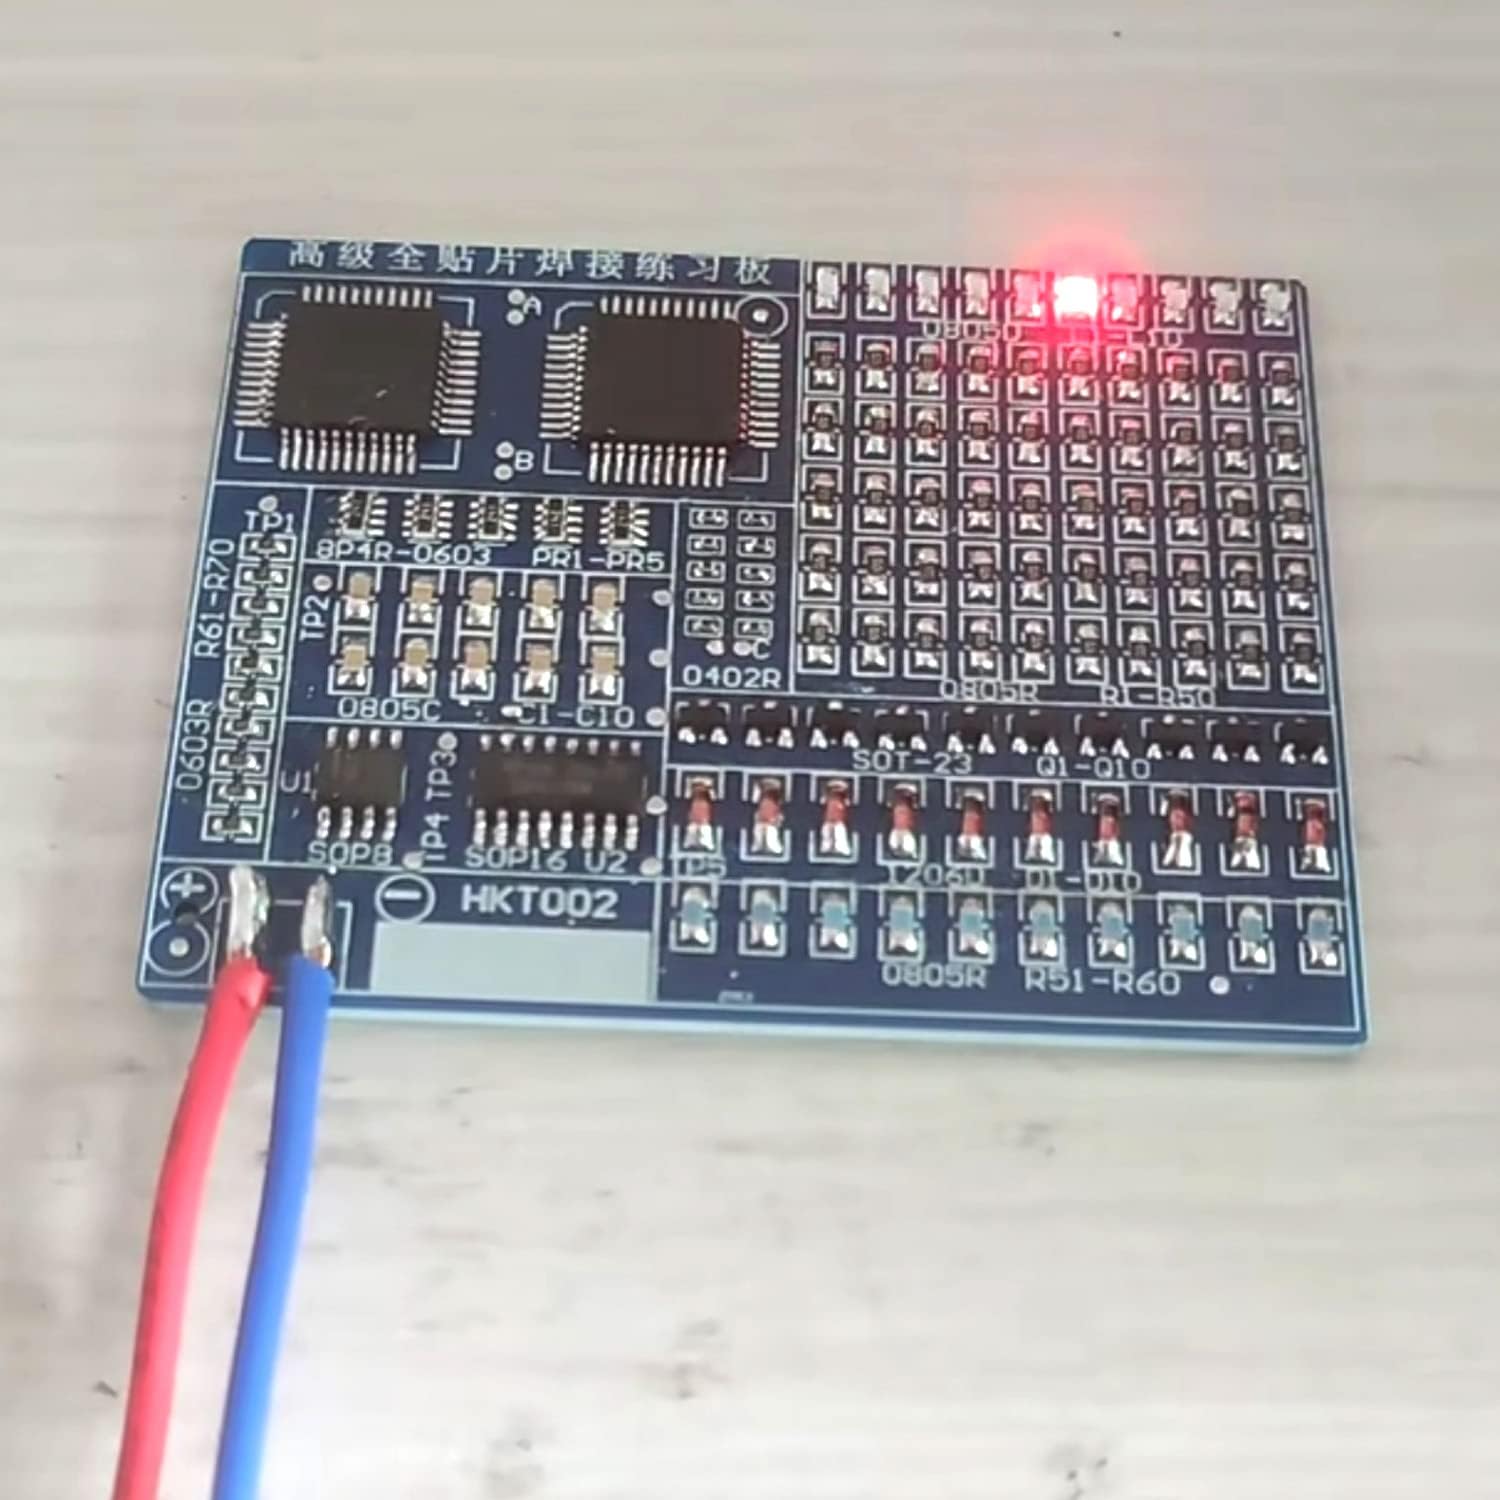
Working principle: Since the voltage across capacitors C1-C9 cannot change abruptly when powered on, the 2nd pin of NE555 is at a low level, and the 3rd pin of the output terminal is at a high level. The current is charged to C1-C9 through R61-R70 and RP1-PR5. When the voltage to 2/3 of power voltage, the level of pin 3 of the output terminal changes from high to low, the internal discharge of NE555 is turned on, and the capacitors C1-C9 are discharged through pin 7 of NE555, until the voltage across C1-C9 is lower than 1/3 of the power voltage, the level of pin 3 of NE555 changes from low level to high level, and C1-C9 is charged again, thus forming a circular oscillation. Changing the size of RP1-RP5 can change the output frequency of the oscillator. The NE555 clock oscillation signal is continuously added to the 14 pin of the 4017. There are 10 transistors connected to the output terminals of the 4017, which to drive the 10 LEDs. Under the action of the clock signal, a high level is generated in turn, then L1-L10 are lit in sequence, forming the effect of a running water lamp. After the SMD components are soldered, power on to form a running water lamp to detect the effect of the soldering
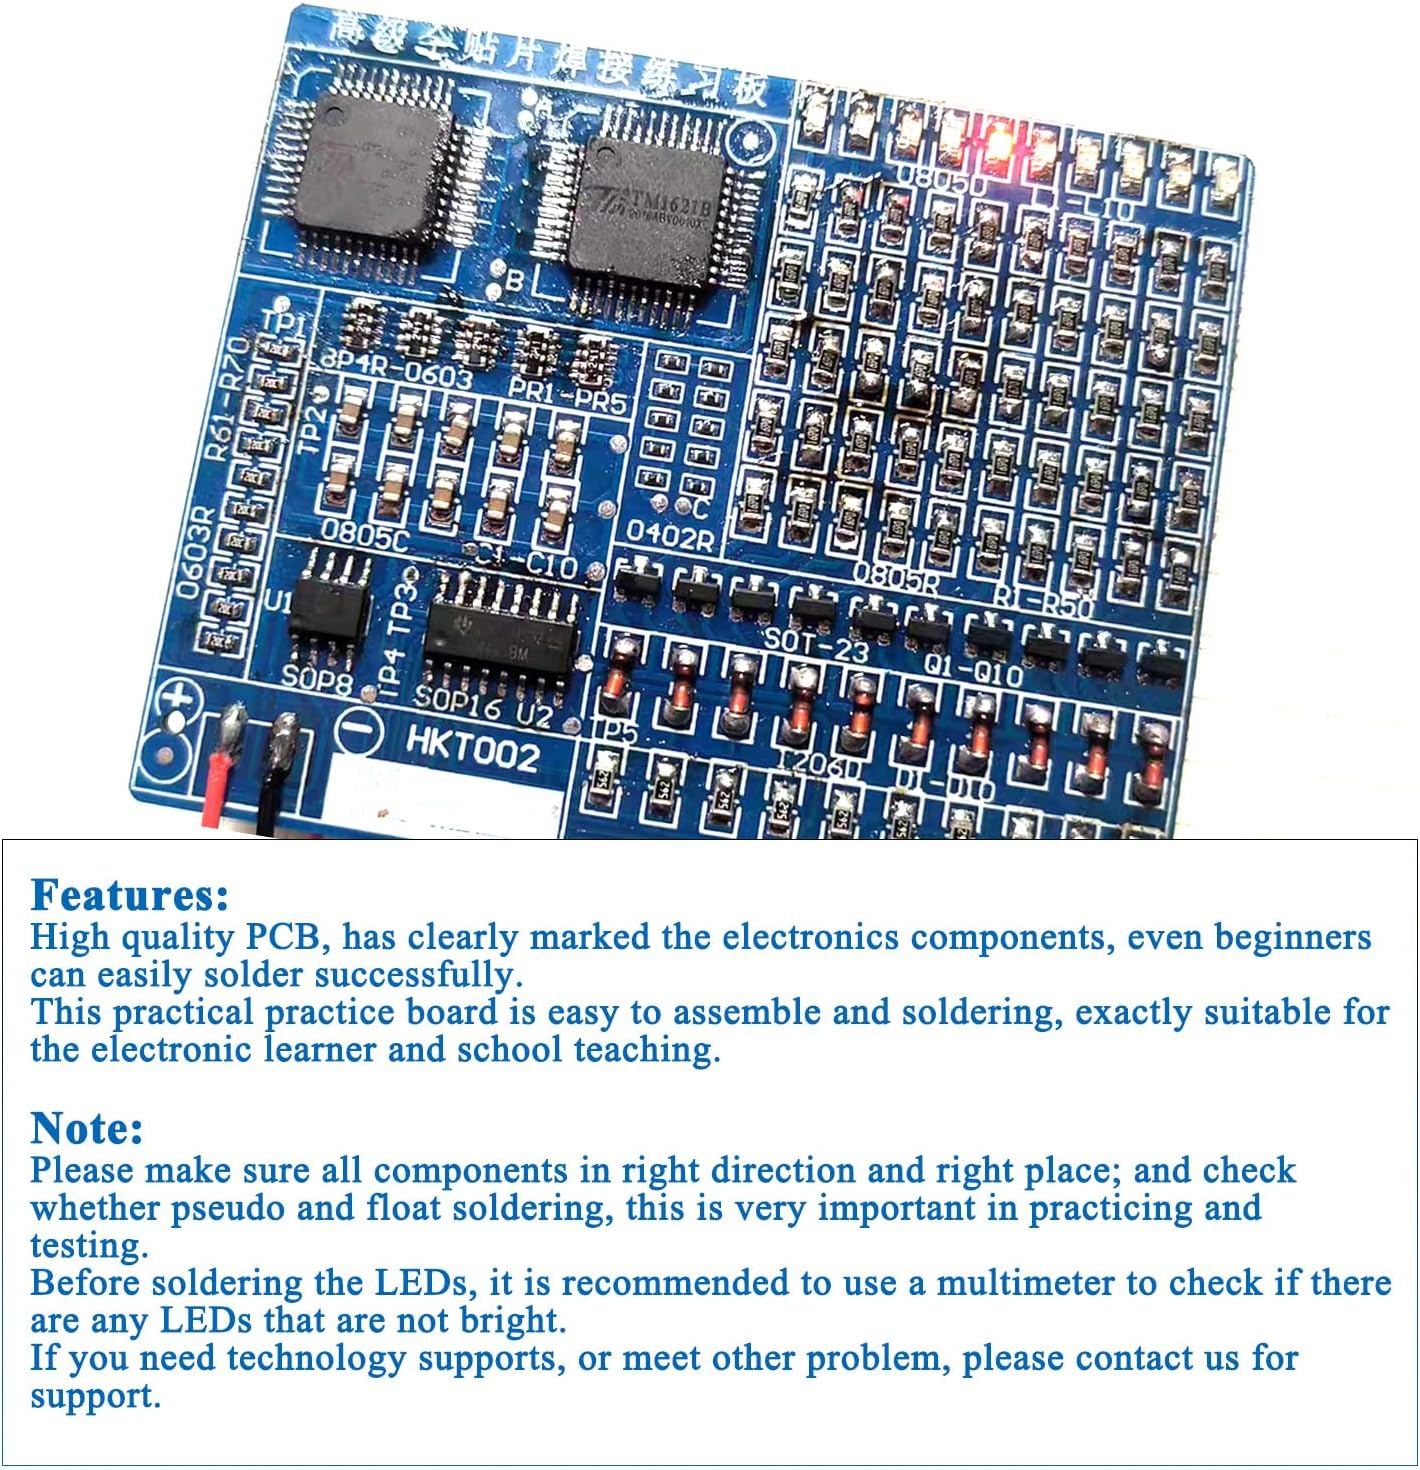
【SMD/SMT Components Soldering Practice Board】: Input voltage: DC5V. The positive pole is connected to +, and the negative pole is connected to -. After the SMD components are soldered, power on to form a running water lamp to detect the effect of the soldering.
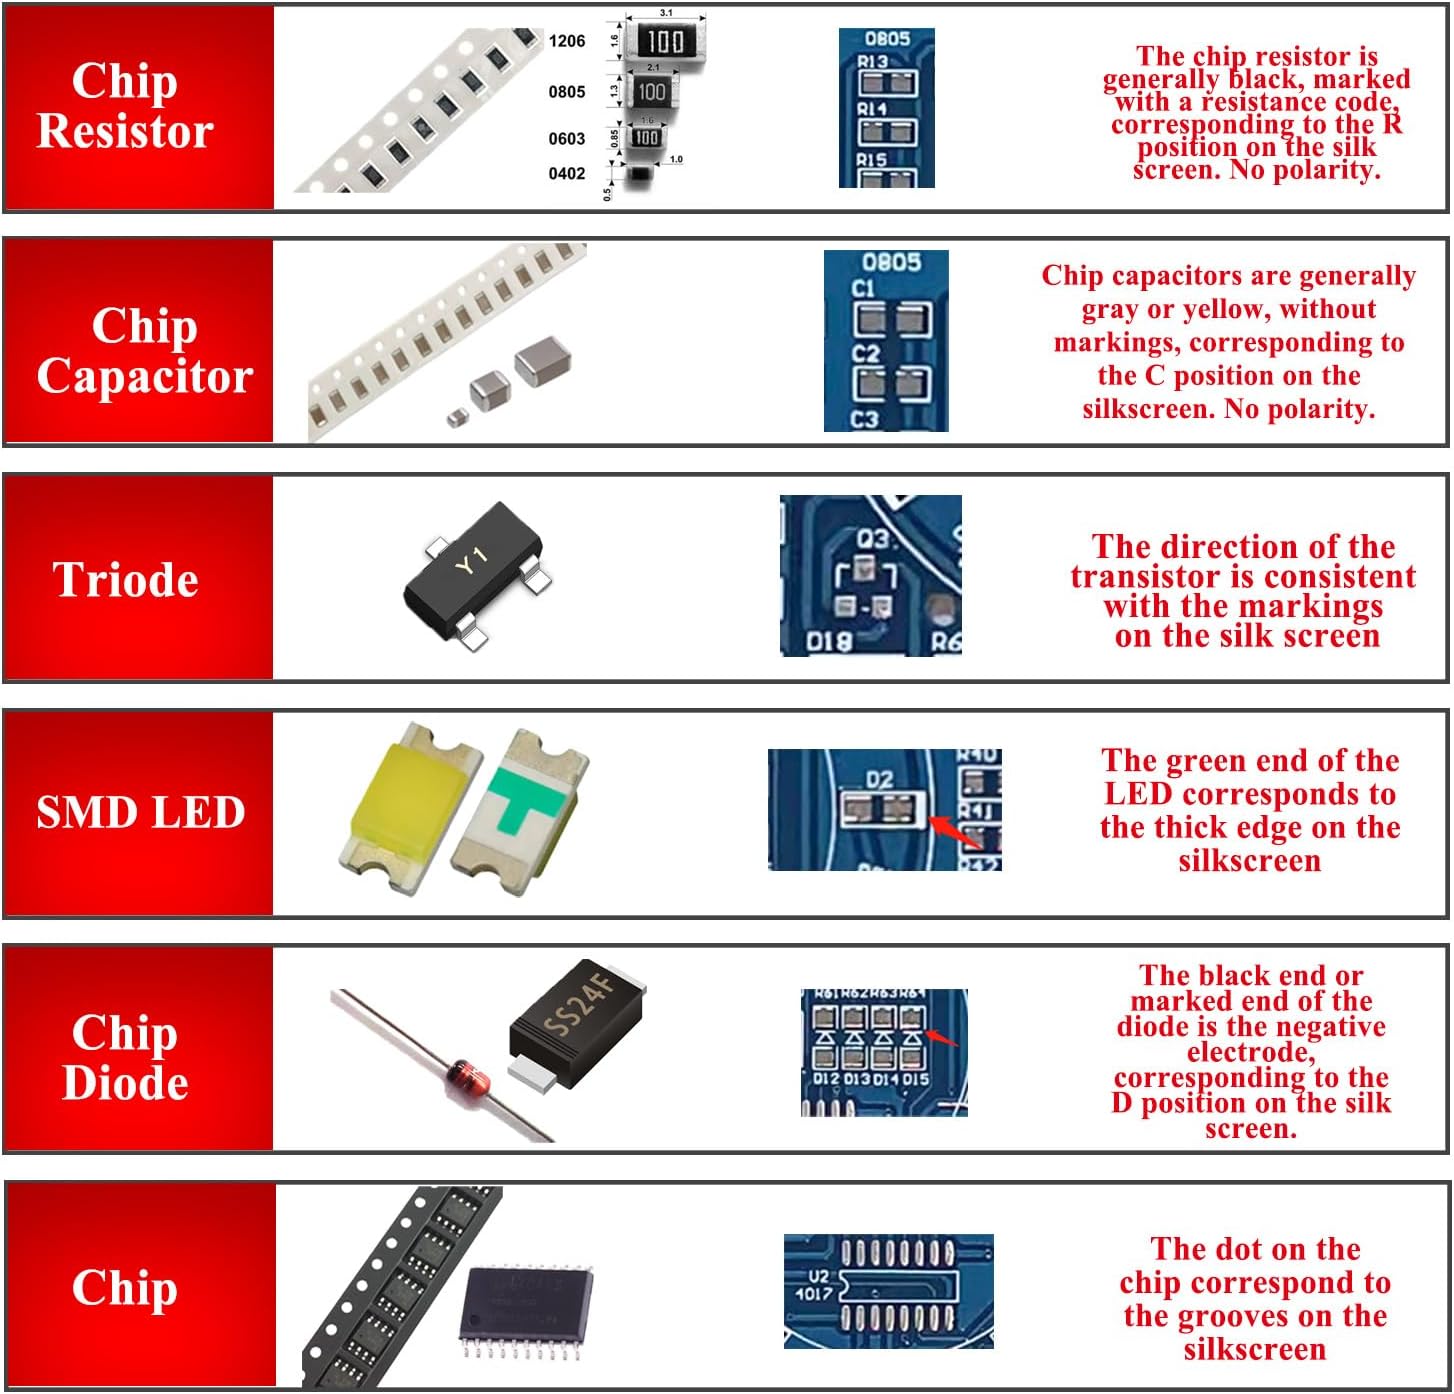
【Before Soldering】: Some SMD components are relatively small, be careful not to lose them. The side of the diode with the green dot is the negative electrode. This electronic soldering kit is not a finished product, it need to be soldered by yourself. Please refer to the English instructions include in the package. If you have any questions, please contact us first for professional help.
【Great Soldering Science Project】: This soldering DIY kit help you understand the basics of working with printed circuit boards and become familiar with a variety of electronic components, and practice soldering skills enjoyably for you and your kids, or students, or DIYers.
【Easy to Assemble】: The connection that was clearly mapped and labeled on the board makes it easy to assemble. And you can refer the marks on PCB board to soldering each component. If it can’t work after soldering, please contact us for support.
【Perfect After-Sale Service】: Please read the User Manual before installing. Our policy is to make our customers happy. If you are not 100% satisfied, just contact our customer service, we will refund your money.


Karl in TNDecember 22, 2024
High qualitypractice
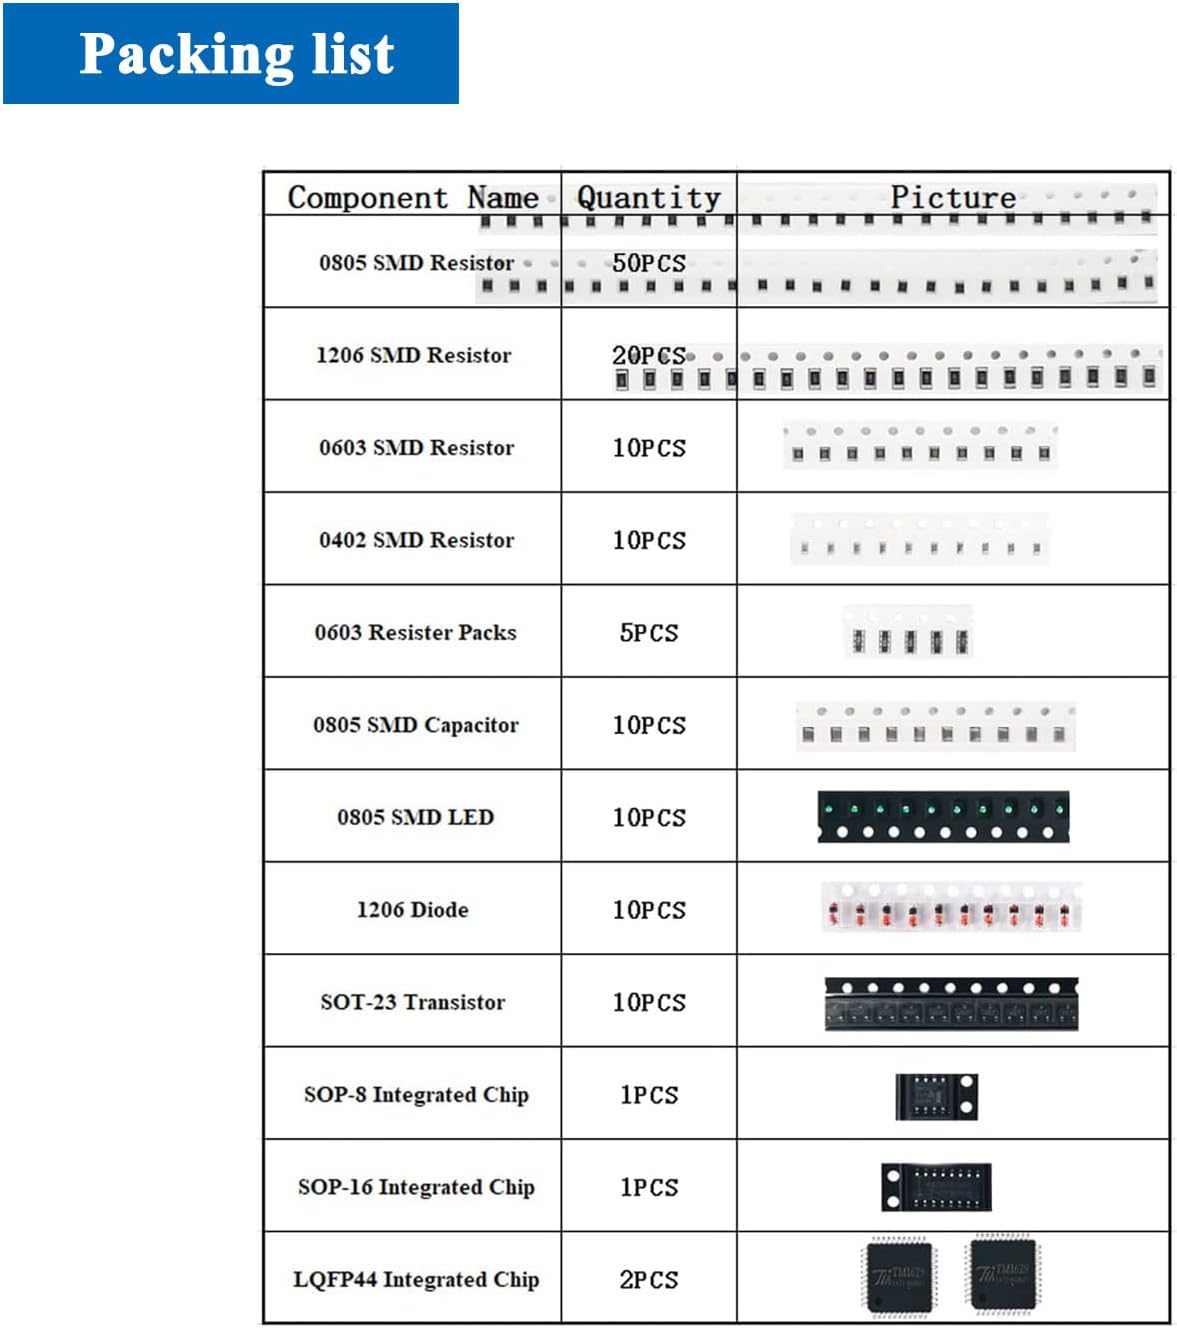
High quality pcb and plenty of different parts in different sizes. Start with the 20 1206 resistors after you sort and identify each part strip (see picture). Work your way from big to small. It takes just a TINY dab of solder paste! Tiny! Need flux and solder paste and heat gun. You can do it with a small solder iron with tiny tip. Magnification required.Update: like I said it is good practice! The lights did not work probably because of shorts caused by too much solder paste. It takes WAY LESS than I put on there!
SteveDecember 22, 2024
buena calidad
buena calidad
William in BucksDecember 22, 2024
These Kits Are a Mess
I purchased one of these and parts were missing. I ordered a replacement and it ALSO had wrong or missing parts.There are NO instructions.The images of the product are NO HELP identifying parts, as the photos are blurred and the part numbers cannot be read !Yes, you can practice soldering, but do NOT expect a functioning product, as the parts seem to be thrown at random into a bag, and who KNOWS what you are putting on the board.I have a LOT of professional pcb experience and could NOT make sense of anything in this kit.I do NOT recommend purchase. Instead, drive down the road and throw your money out the car window.You are welcome.
Bradley H. SmithDecember 22, 2024
Arrived quickly. Great customer service
Youâre going to get exactly what you expect which is a great kit to learn to solder. There was an issue with one of the components in my package but they were quick to resolve the issue!
KiafDecember 22, 2024
SMT SMD soldiering kit
Enhances soldiering techniques for surface mount componente.
Joe HDecember 22, 2024
Instructions are a joke
The instructions don’t make an ounce of sense. I’m not even convinced the manual I got is for this kit…but I can’t decipher enough to know it isn’t.
D. PatrickDecember 22, 2024
Highly recommended – Perfect for SMD soldering practice!
I received one of these boards as a gift from my daughter, so that I could practice soldering surface mount devices. I think the value cannot be beat; there are a plethora of parts and sizes involved in building the kit, some of which will be a stretch for your abilities. The 0402 resister pads may be 4mm by 2mm, but the part itself is quite tiny! The hardest chips for me were the 1206 resistor packs, because they cram 4 legs on each side of the chip; I spend some time re-doing them before getting it “good enough” for the 555 timer. The 44 pin chips are just duds for practice and are not actually part of the final circuit, which just blinks the 10 LEDs. A schematic is provided but not much else; it would be best if you already understand basic electronics and soldering.My advice: Get some good tweezers, and a hot air gun for removing chips you have messed up, and be sure to have extra flux on hand to help break up solder bridges.It really quite amazing the number of parts in this kit, and for only $8! Fun to build if you’re looking for a chance to practice!
Wood HogDecember 22, 2024
Nice Set, Smaller Than Expected
Nice practice board, but it is smaller than it looked. I skipped soldering the 0402 parts. The board works when finished. Pretty cool item, especially for the low cost.
Tony.PDecember 22, 2024
Good practice for soldering small components.But instructions were unclear and not that usefull. The first picture on amazon is what helped me the most. I somehow managed to get everything working in the end but this was truly a good challenge.